
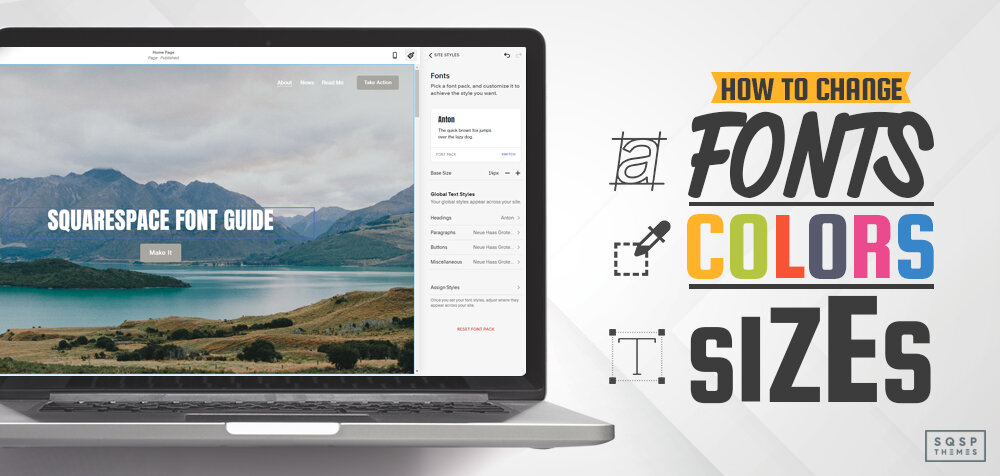
Squarespace Font Guide: How to Change Fonts, Colors, and Sizes
Squarespace makes it easy to customize your site’s fonts, colors, and text sizes using the Site Styles panel.
Here’s how to do it step by step.
Step 1: Open the Site Styles Panel
This is where you’ll make all design changes.
How to access Site Styles:
Go to your website editor (log in and click on your site).
Click the Paintbrush icon (top-right corner of the editor).
OR, go to Design > Site Styles from the main menu.
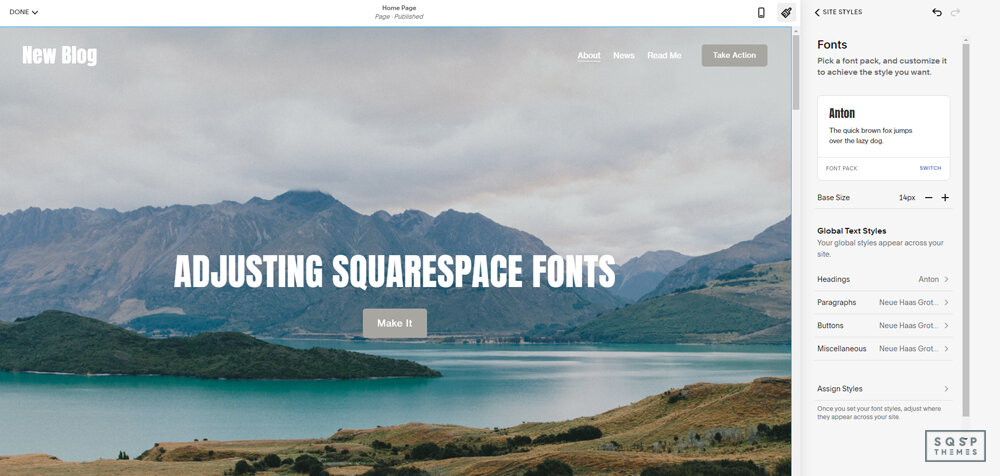
This opens the Site Styles Panel, where you can adjust Fonts, Colors, and other design settings.
Step 2: Change Fonts
You can either pick a font pack (pre-designed styles) or choose fonts manually.
Option 1: Use a Font Pack (Quick & Easy)
Click Fonts in the Site Styles panel.
Click "Switch Font Pack" (you’ll see different font combinations).
Pick the one you like – it automatically applies to headings, paragraphs, and more.
Click Save when happy with your selection.
Option 2: Customize Fonts Manually
Go to Site Styles > Fonts
Click on the text type you want to change (Headings, Paragraphs, Buttons, etc.)
Click the font name to open the font selector.
Browse or search for a font (Squarespace supports 1,600+ fonts from Google & Adobe).
Click on a font to apply it.
Save your changes.
💡 Pro Tip: You can set different fonts for Headings (H1, H2, H3, etc.) and Paragraphs (P1, P2, P3).

Squarespace supports web fonts from Google and Adobe. Google Fonts has over 1,000 different fonts on offer, of which Squarespace supports around 600. Adobe Fonts has 2,300 different fonts in their library, of which Squarespace offers 1,000 of them. Why the limitation? I’m not sure. It may be that they offer full access and Squarespace simply hasn’t updated the numbers they mention as supported since there were lower numbers of fonts in the libraries.
It’s worth mentioning that, because Google and Adobe are third-party companies, sometimes they change their service without warning. They can remove fonts, regardless of how many people are using them. When this happens, the font will still work for your site, but if you choose to change away from the font, you won’t be able to change back if you decide you don’t like the new one. Thankfully, there are thousands of fonts available, and a lot of them look similar enough to one another that you can probably find an adequate replacement. That’s if you’re in this specific situation which is unlikely to happen.
If you know a specific font you want to use, you can search for it by name. If you don’t know the name of a font, you can browse through available fonts to find one you like.
Squarespace doesn’t offer unfettered access to all fonts right away. They highlight a handful of fonts to give you options first. These options include a handful of popular fonts, as well as any fonts you’ve chosen to use recently or added to your site in other places.
Click here to learn how to add custom fonts to your Squarespace 7.1 site
Step 3: Adjust Font Size & Text Styles
After choosing fonts, you may want to tweak size, boldness, or spacing.
How to change font sizes:
Open Site Styles > Fonts
Click on the text type you want to adjust (Headings, Paragraphs, etc.)
Look for the Size slider and drag it to increase or decrease text size.
Adjust other settings if needed:
Font Weight (Normal, Bold, Extra Bold, etc.)
Line Height (Space between lines)
Letter Spacing (Adjust the space between letters)
Text Transform (Uppercase, lowercase, or capitalized styling)
Click Save when done.
💡 Tip: Always preview your changes on mobile and desktop to make sure it looks good.
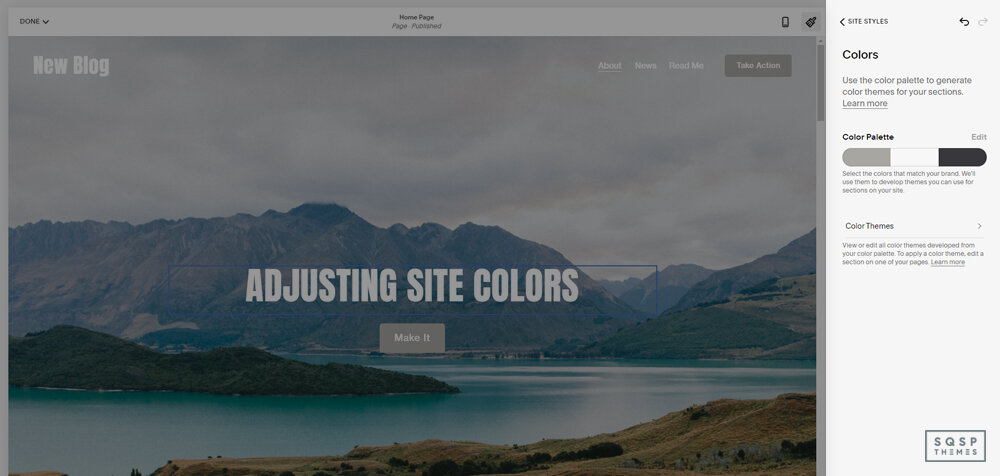
Adjusting Site Colors
As of Squarespace 7.1, you no longer have to deal with colors on an individual basis, picking specific elements and coloring them and hoping everything looks good and is consistent across different kinds of pages. Instead, you pick color themes, which are color palettes that work together and color different elements of your site across the board. While it might seem less flexible, it’s just as customizable as before, just differently.
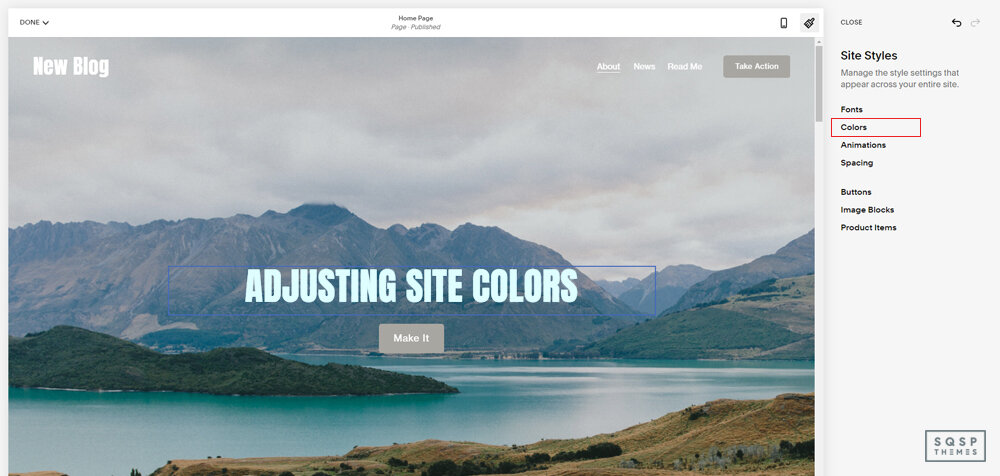
Step 4: Change Site Colors
Squarespace 7.1+ uses a Color Palette system to ensure consistent styling across the entire site.
How to change your site’s colors:
Open Site Styles > Colors
Click Edit Palette
Choose your color scheme:
Use a Preset Palette (ready-made color sets).
Extract colors from an image (upload an image, and Squarespace will generate colors from it).
Pick a main color and let Squarespace create a matching palette.
Manually select colors using the color picker (if you have specific brand colors).
Save your palette – this updates colors across your site.
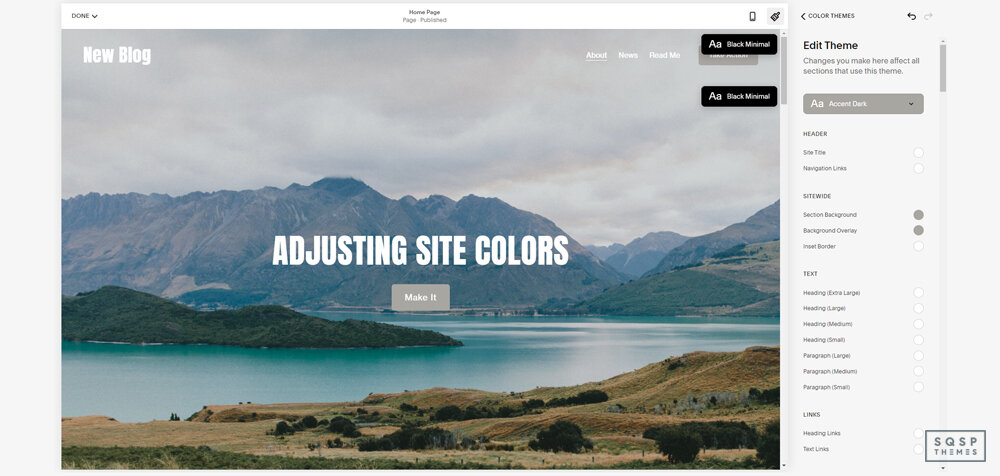
Step 5: Change Colors for Specific Sections
Each section on your website has a Color Theme (Light, Dark, Bright, etc.). You can customize them!
How to change a section’s colors:
While editing a page, hover over a section and click "Edit Section".
Click the Colors tab in the section settings.
Choose a Color Theme (Squarespace will apply your palette’s matching colors).
Save your changes.
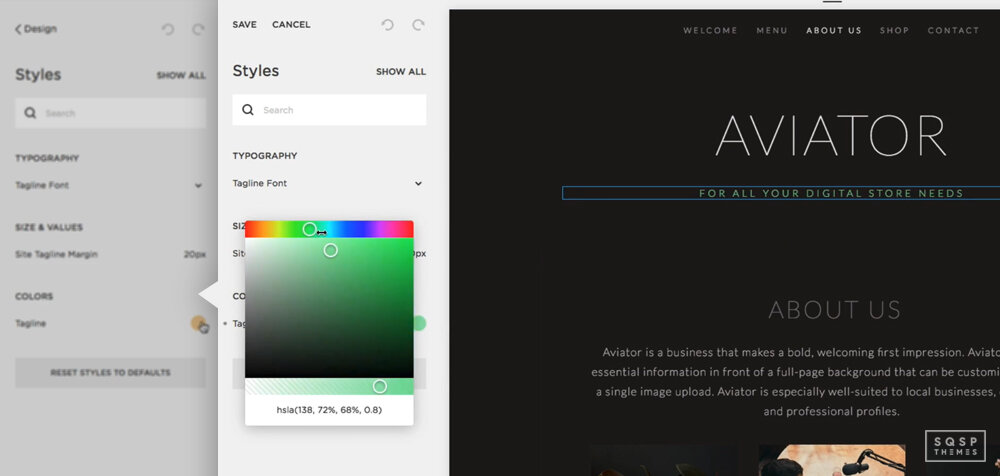
💡 Need more control? You can edit specific colors within a Color Theme:
Open Site Styles > Colors
Click on a Color Theme (like "Bright 2" or "Dark 1").
Adjust specific elements (Background, Text, Buttons, etc.).
Save – all sections using that theme will update.
Adjustments in 7.0
Everything I’ve written above is for Squarespace 7.1. I figured that, since it’s the newest version and a lot of people are still shifting over and learning how it works, it’s where most of the common questions come up.
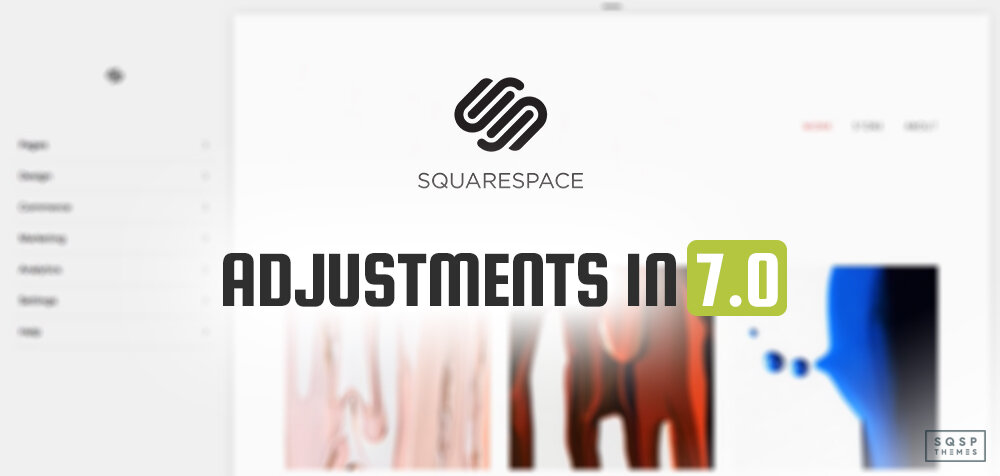
For 7.0 sites, everything is more complicated, but also, most people already know how to do it. Since 7.0 has been the default for years, it’s more institutionalized as knowledge in how to customize a site. Still, it might be worth covering in brief.
Changing fonts in 7.0 depends on the theme you’re using, which fonts it supports, and the process you use to choose them. Pick a page template you want to edit, click on Design, choose Styles, and all of your font options are right there.
Choosing a specific font works in much the same way, but is on a per-element basis on each page type. If you want to change how your body paragraph text appears across different pages on your site, you’ll need to change the font on each page type. You can still use the same sort of font-family drop-down menu to look up fonts by name or even run a search for them (if you know what font you want to use).
You can also choose to use the custom fonts option to add an Adobe font that Squarespace doesn’t support by default. If you choose to do this, be aware that some of the configurations in Squarespace, like transforms, might not work right on it and you may need to use custom CSS to do what you want. That said, with the sheer range of font options available to you, I don’t often find people wanting to use CSS just to add a different font outside of extreme, limited, and custom circumstances. If you want to explore CSS values, Mozilla wrote a great guide on the subject.
To add a custom font, it has to be an Adobe font (Google fonts don’t work) and you have to use the custom fonts section to do it. Instructions can be found on this page. Essentially, you need to have a subscription to the Adobe Creative Cloud and link that account with Squarespace. You can then choose a custom selection of Adobe fonts, which will replace the fonts accessible to you in your existing site styles. Be careful if you use these for other purposes on your site; you don’t want to overwrite the fonts you use.
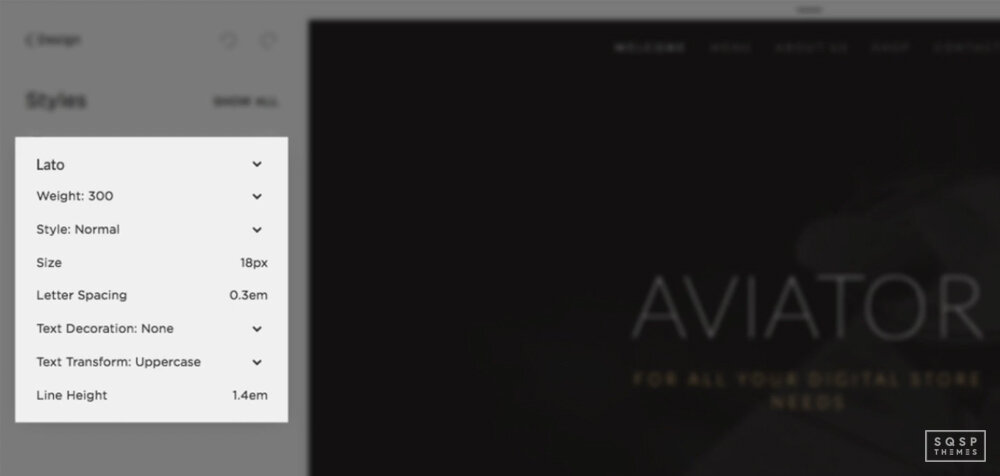
Tweaks to the text can also be added from this menu.
Font Size: changing the size of the font element on the page.
Light Height: changing the space between lines, vertically. Beware of using 0em, it can cause text to overlap.
Letter Spacing: the spacing between letters. This is similar to Kerning, but not quite the same concept.
Text Transform: choosing whether your text can be capitalized as you type it, or if it’s by default all caps, no caps, or traditional capitalization.
Text Decoration: adding elements to text, such as overlines, underlines, or strikethroughs.
Text Alignment: left, right, or center alignment for your text.
This isn’t quite the same selection of options, but it’s close.
Changing colors for your site works pretty much the same way on 7.0 as it does on 7.1. The main difference is that you choose colors on a per-page basis rather than a per-site basis. Thus, if you want to change colors across your whole site, you need to make the color adjustment on each page. You can read about the individual color adjustments you can make, and how to make them, here.
Overall, Squarespace 7.1 has done a lot to streamline and remove the finicky little repetition that was inherent in the font and color customization systems. It’s all part of streamlining their themes, going from individual theme families to one centralized theme with variations and modular adjustments. It’s an adjustment, to be sure, but this simplification is welcome.
Recap (Quick Cheatsheet)
✅ Change Fonts:
Go to Site Styles > Fonts, choose a Font Pack OR select fonts manually.
✅ Adjust Font Size & Style:
In Site Styles > Fonts, use the Size slider & tweak weight, spacing, and style.
✅ Change Colors (Site-Wide):
Go to Site Styles > Colors, edit your Color Palette, and save.
✅ Change Colors (Per Section):
Click Edit Section > Colors to switch between Light, Dark, Bright themes.
Final Tips
Preview changes on desktop & mobile before saving.
Use Font Packs & Preset Colors for quick styling.
Customize individual sections if you want unique looks for different areas.